Like the title says, this is my absolute favourite gingerbread. I’ve tried several recipes over the years, and this one is the clear winner. It’s got a lovely soft texture; it holds its shape well and doesn’t spread, so it’s perfect for cookie cutters; and most importantly, it’s absolutely loaded with flavour. We’ve all had those gingerbread cookies that are bland and forgettable, ginger in colour only. Not this one. This has been my go-to gingerbread recipe for years now. I make it every Christmas, and often in the fall as well. Pretty much any time I want to use my cookie cutters during the colder months, this is the cookie I make.
This blog is all about trying different recipes, but I can already tell I’m going to have to force myself to try a different gingerbread recipe. That’s how much I love this one. But I’ve been making this one for a looooong time – I still have the page torn from the 1997 issue of Food & Wine. I guess it’s time to try something else, right? That doesn’t mean I’m retiring this one – just expanding my horizons.
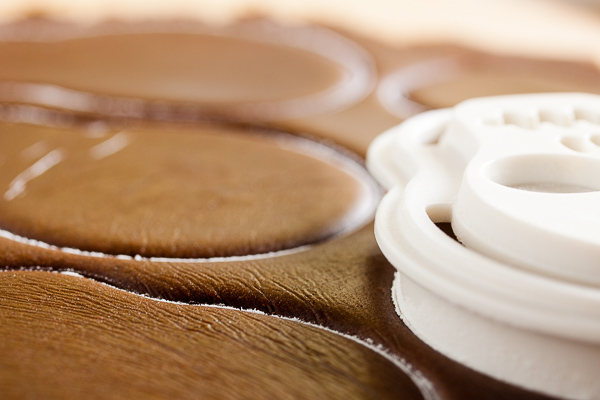
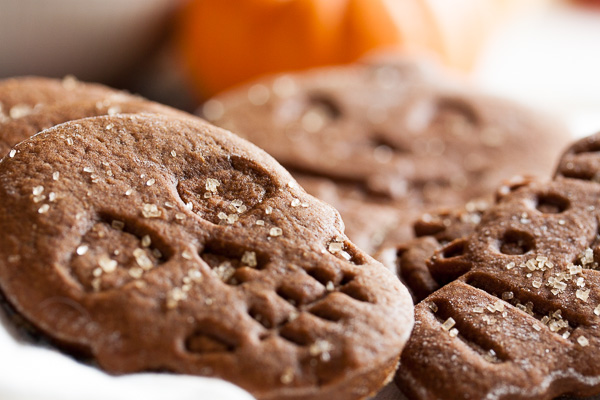
For this batch, I tried out a new Halloween cookie cutter set I got recently at Williams-Sonoma. Here’s the link, but they switch up their seasonal items regularly so I doubt it will be valid long. They’re cookie cutters on one side, with pattern impressions on the other.
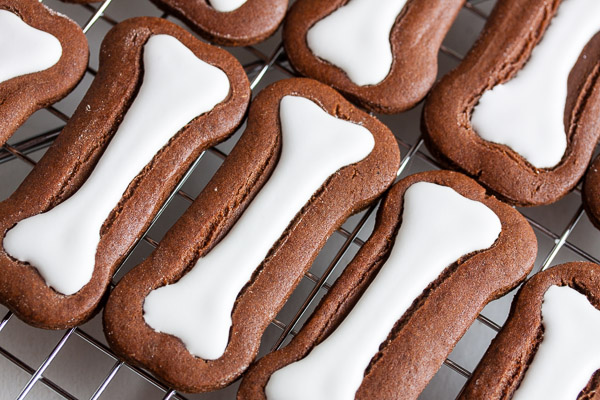
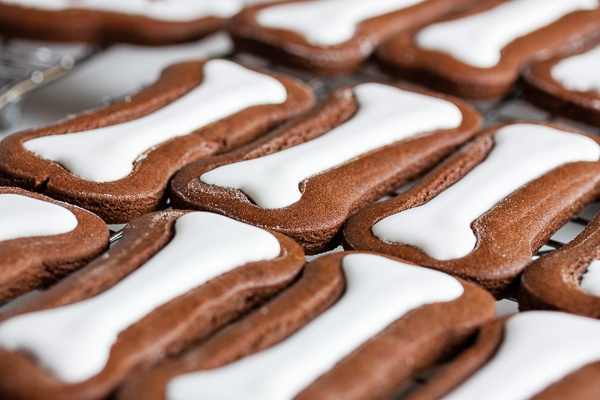
When I saw the first tray of bones come out of the oven, I thought to myself “uh-oh, those look like dog bones… will people know they’re supposed to be Halloween cookies?” And what did I hear when I brought them to work? “ooh, dog bones!” No. Spooky bones! Spooooooky bones. *sigh*
I’ve tried a lot of different techniques for rolling out cookie dough over the years, but found most of them messy and inconsistent. The method I’ve finally settled on works great for me. I don’t flour the surface at all (all that extra flour can make for a tough cookie), but I put down parchment paper instead. If you plan ahead, the cut shapes don’t need to be moved and can be baked on the same parchment as-is. The dough releases really easily from the parchment though, so I usually end up moving them anyway.
Some people put parchment or wax paper on top of the dough as well to keep the rolling pin clean, but I’ve always found that the dough curls a bit as it’s rolled out (I’m sure I’m doing something wrong there), which causes the top paper to wrinkle or tear; but a piece of plastic wrap on top of the dough is flexible and works great.
Finally, I put down a couple pieces of craft wood the thickness I want the dough to be to use as guides for my rolling pin (because apparently I suck at rolling dough out to a consistent thickness – can you see why I don’t make rolled cookies very often?). You can get these at most craft stores for just a couple dollars, and they’re available in a range of sizes. There’s a better explanation (because I forgot to take pictures!) in this video.
When it comes to using cookie cutters, I find that dipping them in flour (or icing sugar) after each cut can help prevent the dough from sticking. I also wiggle the cutter slightly, immediately after cutting, before trying to lift the cutter. This helps release the dough as well. If you try this, be careful not to wiggle it so much that you distort the shape.
I usually roll this dough 1/8″ to 3/16″ thick, but to allow for the pattern impression I rolled them thicker, at 1/4″. In hindsight, I probably could have still gotten away with a thinner cookie, as the impression isn’t really that deep.
As I mentioned already, this cookie doesn’t spread, but apparently it puffs up a bit, which obscured the pattern impression somewhat. It was still enough to be a guide for icing, though. It took me a few tries to figure out how to get the icing to work on these, so I had a few “irregulars” that I had to keep for myself. Not complaining.
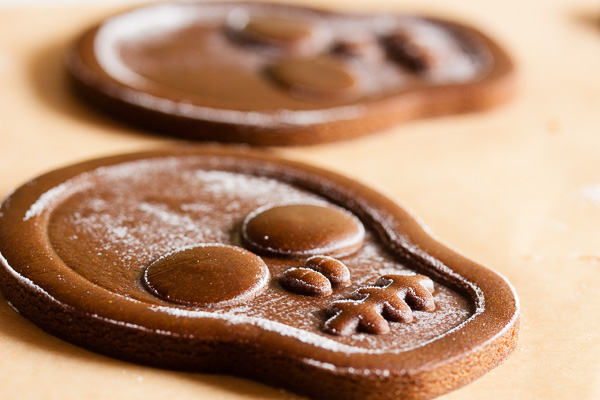
You’ll often see royal icing referred to in time increments – like 10-second or 5-second. This refers to the amount of time it takes for a thin ribbon of icing to disappear into the surface of a bowl of icing – basically you lift up your beaters or spatula and let the icing drizzle back into the bowl, and time how long it takes for the surface to flatten back out. For the bones, I was able to use regular flood-consistency royal icing (about 5-second). The detail on the skull, however, was pretty intricate and tiny. I ended up thinning the icing a lot before it would go where I wanted without completely obscuring the skull face (less than 1-second). I piped the icing very loosely following the outline of the skull, and used a toothpick to push it where I wanted it.
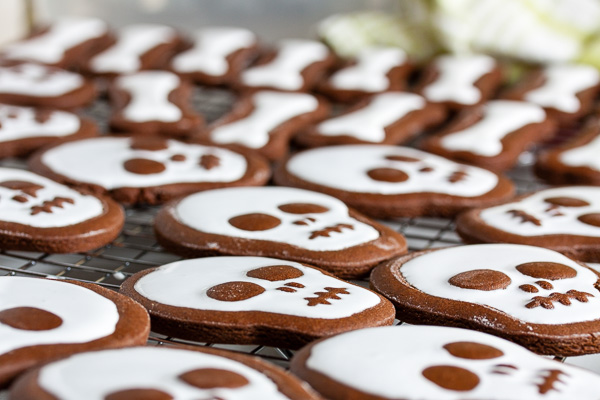
I was confident the icing on the bones would dry overnight, but I was really worried about the skulls not drying because the icing was so wet. So I popped them into a just-barely-warm oven for about half an hour. I turned the oven on the lowest setting, just until the light turned on. Left it on for a few minutes, until I could reach my hand in the oven and feel that it was warm but not hot, then turned the heat off. If it feels too hot, leave the door open for a minute to let it cool down a bit. This will help dry out the royal icing quickly, but isn’t enough heat to overbake the cookies. I didn’t notice any difference in cookie texture at all. The icing wasn’t dried completely, but enough that I was sure it’d finish drying overnight.

my favourite gingerbread
Adapted from the December 1997 issue of Food & Wine.
ingredients
4-1/2 cups all-purpose flour
1 tablespoon plus 2 teaspoons ground ginger
1 tablespoon unsweetened cocoa powder
2 teaspoons cinnamon
1 teaspoon ground cloves
1/4 teaspoon freshly grated nutmeg
1 teaspoon baking soda
1 teaspoon salt
3/4 cup unsalted butter, softened
3/4 cup firmly packed light brown sugar
1 large egg, at room temperature, lightly beaten
1 cup unsulphured molasses
for the royal icing (optional)
2 egg whites (or 1-1/2 tablespoons powdered egg white and 1/4 cup warm water)
pinch cream of tartar (optional)
2 cups confectioner's sugar, sifted
food colouring (optional)
In a medium bowl, whisk together the flour, cocoa, spices, baking soda, and salt. Set aside.
In the bowl of a stand mixer fitted with the paddle attachment, beat the butter and sugar together on medium speed until light and fluffy, about 3 or 4 minutes. Scrape down the sides of the bowl and add the egg, beating well. Gradually add the molasses and continue to beat until it's smooth.
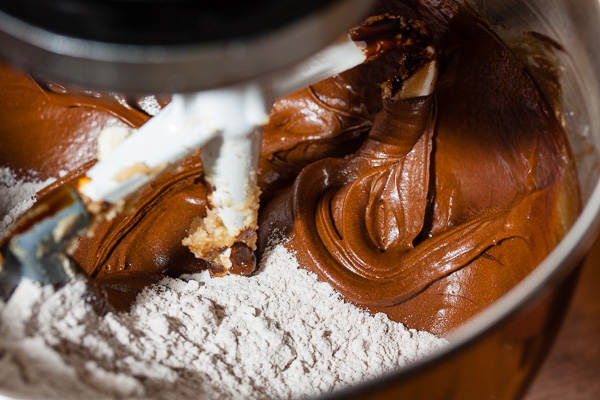
Scrape the sides of the bowl again. Turn the mixer down to low and add the dry ingredients in 2 portions, mixing until just barely combined. Remove from the mixer. At this point, every time I make this recipe, I think I mis-measured something because the dough is so crumbly. Trust me – knead it together by hand for a minute, and it will come together.
Divide the dough into 3 equal portions. Flatten each piece to about 1/2" and wrap each in plastic. Refrigerate for at least 3 hours (overnight is fine).
When ready to bake, preheat the oven to 350°F. Remove one of the dough pieces from the fridge (many people recommend rolling the dough out cold, but I find it easier to work with when it's warmed up a bit). On a lightly floured surface, a silpat sheet, or a sheet of wax or parchment paper (whatever your preference), roll the dough out to 1/8" to 3/16" thickness.
Cut the dough into desired shapes and transfer the cut pieces to your cookie sheet. I find that dipping the cookie cutter in flour after each cut helps prevent sticking. Once you have a sheet full, bake the cookies for about 10 minutes, rotating the baking sheet halfway through, until they just begin to colour. Allow to cool on a wire rack for a few minutes before removing the cookies from the pan and allowing them to cool completely before icing.
Repeat with the rest of the dough.
royal icing
You totally don't have to ice these cookies. I've made this gingerbread without icing before, and it tastes great. However, if you want to get fancy...
I've seen a few different methods for mixing royal icing. Some recipes call for whipping the egg whites to a stiff peak before adding the sugar, but I don't think that's necessary. The first recipe I tried just called for combining the ingredients together right off the bat and mixing, and it worked fine, so I've stuck with that.
In the bowl of a mixer fitted with the whisk attachment, combine the egg whites, confectioner's sugar, and cream of tartar (optional – it just helps to stabilize the egg whites). If you're using powdered egg whites instead of fresh, you can whisk them together with the water first and let them stand for about 3-5 minutes to hydrate before combining with the other ingredients.
Beat on low speed for about 30 seconds, just until all the ingredients are mixed together so you don't end up with confectioner's sugar all over your kitchen. Scrape down the sides of the bowl and increase the mixer speed to medium high. Continue beating for about 5 to 7 minutes, until the icing is glossy and stiff peaks form.
If you're going to use colours, add them before thinning the icing, as the colouring will have an effect on the thickness. Divide the icing into separate bowls, one for each colour. Add the colour, mixing well until you achieve the hue you want. Then thin the icing with water until it's the consistency you want – be careful to add the water very slowly so it doesn't get too thin too quickly, just a teaspoon or so at a time. If you do happen to make it too thin, you can add a bit more confectioner's sugar, or some of the uncoloured icing.
Once you're happy with the colours and consistency, transfer the icing to pastry bags fitted with decorating tips. If I'm doing fine line work, I like to use a #1 plain tip. For these cookies, I used a #2. To keep the tip from drying out & getting crusty, store the bags of icing tip-down in a drinking glass with a piece of moistened paper towel in the bottom. If you don't finish your decorating all in one session, this icing will keep in the fridge for a few days.
I found that this made way more icing than I needed for this particular cookie recipe, but working with smaller amounts in the mixer is a bit difficult. Feel free to cut the icing recipe in half if you want to give it a shot, though.
There are a lot of amazingly talented cookie decorators out there. Check out sweetsugarbelle, sweetopia, and sweetambs for some inspiration. These people are amazing. I won't even pretend to be able to do what they do.









i am so trying out this recipe for my gingermen this year. thanks for sharing 🙂
Yay! I hope you love it as much as I do. 😀
Great looking cookies. I am making for Christmas today!
How many eggs go in the dough? The list says one, but the directions imply there are more.
Thanks!!
Whoops! Just the one egg (I’d copy-pasted that from another recipe). I’ve fixed the instructions – thanks for the catch!
Love these shapes! VERY impressive. Makes me want to make them tonight!
Kiri
Hi,
These cookies look absolutely amazing.I don’t use eggs in my cooking.Can u please suggest me some replacements for egg and also for unsulphured molaasses ? Thanks !
Thanks! Unfortunately, I’m not a professional baker and don’t have issues with eggs personally, so I’ve never had to look into replacements. Sorry, I can’t help you with your questions. Good luck though!
[…] out Laurel’s recipe for the instructions. Here are the measurement […]
I just love your skull and bone cookies! Especially how there are wells for the icing. Can you share what company made the cutters/molds and where they are available for purchase? I’d like your make your gingerbread recipe in the same skull and bone shapes that are featured in your pictures. Thank you so much for the wonderful inspiration.
Hi Jean. Thank you so much! I got these cutters at Williams-Sonoma. Unfortunately, the link I had in the post doesn’t seem to be valid anymore. It’s possible they’re only available around Halloween, but quite often Williams-Sonoma doesn’t bring their specialty cookie cutters back again. I did find a few of them offered on eBay though (link here). Good luck!!
I made this dough tonight and it wasn’t as crumbly as you indicated in the post. Any ideas what went wrong? Do you spoon and level the flour or scoop it? What about measuring the molasses? I really scraped the molasses out of the measuring cup. Maybe it ended up being too much? Any tips you can offer would be appreciated!
Hi Beckie
I honestly wouldn’t worry about it too much. It could be as simple as your butter was softer than mine or your kitchen was warmer than mine (I’m in a new place now, but my old kitchen was always cold in the winter). Maybe you just mixed it longer than I usually do, because this dough always does come together for me eventually. If you find it sticky when you go to roll it out, sprinkle a bit of flour on it to make it more manageable. And please let me know how it turns out 😀
Quick edit to add that I usually stir my flour to aerate it and then scoop it gently, and I measure my molasses and butter by weight.
This is the ABSOLUTELY best gingerbread recipe I have ever made. Just happened upon it with a google search! Not crumbly at all. Cookies have a nice chew. Love the flavor. I’ll be decorating them in the morning. Thanks Laurel <3
Thanks Sue, I’m always happy to share this recipe – everyone should try this cookie! And can I just say “wow, are you talented”. I just checked out your website and I’m in awe. I wish I had half your talent 😀
Hi Laurel,
Would it be ok if I leave out the unsweetened cocoa powder? Would it make the cookies taste different?
Hi Nicole
I’ve never tried the recipe without the cocoa powder so I’m not sure. There isn’t a lot of it, so I don’t expect it would make a HUGE difference, but maybe it would be missing some of the nuance of flavours? There’s enough else going on here that it will probably still taste great though! If you try it, please let me know. 🙂
How many cookies does do the ingredients listed make?
Hi Sana – that really depends on how thick you roll the dough and what size cookie cutter you use, so I can’t really give you a number. But I can say there will be LOTS.
hi there!! I’m currently in the middle of making these and there is so much dough ( not complaining 🙂 ) but i was just wondering am i able to freeze some of the dough? and bake when i need more?
Hi Ellie – yes, absolutely! Almost all cookie doughs will freeze really well. I’d recommend rolling the dough out between a couple pieces of parchment paper, then wrapping it in plastic wrap to freeze it. If you freeze it in a ball, you’ll need to thaw it before you can roll it out again when you want to bake.
Even better, you could cut the shapes and freeze those! Then you can pop them on a baking tray when you want a cookie 🙂
[…] Gingerbread Snowflakes by Wanna Come With […]
Hi!I just recently started baking & this will be my first time making a gingerbread cookie.I’m having difficulty geting molasses…what do you recommend I could use as a substitute?
Hi Mai – I’m so sorry for the late reply. I’m not sure I could really recommend a substitute, though, because the molasses is a pretty big part of the gingerbread cookie flavour. Substituting with some other type of syrup will still give you a good cookie, but it wouldn’t really be gingerbread. I hope you were able to find something. 🙂
[…] 4. Snow flake Ginger bread Cookies: Recipe here […]
[…] My Favorite Gingerbread by, “Wanna Come With?” […]
Hello
I just put my disks in the fridge, and am really still questioning if the dough will crumble and the shapes will hold when I make my cookies. I needed the dough all together and then tried in smaller portions. It was crumbly all the way to making the disks. It holds together, but any pressure I apply the dough does not stay together … I am hoping after chilling I will have success, but I fear having to try another recipe. Any thoughts on why it may not be coming together like you described? Maybe I should t have added all the 4 1/2 cups flour.
Hi Pauline
Once the dough’s had a chance to sit for awhile, the flour will become more hydrated and it should hold together better. Trust me, I’ve had the same thought as you when I’ve made this recipe, and it’s always been okay. IF, however, you’re still finding it crumbly, it’s perfectly fine to add a tiny bit of water just to get it to hold together. Don’t add too much – like 1/4 teaspoon at a time until the texture feels better. The extra moisture will bake out in the oven. Let me know how it works out for you!
[…] Those two words alone scream Christmas to me, so why not include them? Gingerbread cookies have a great, holiday flavor and are great for children to decorate. The possibilities are endless with these cookies. One can cut out the traditional gingerbread man and woman shapes or get more creative and cut out Christmas trees, candy canes, or snowflakes! Gingerbread cookies are the ideal cookies for families with an abundance of kids in the house or for anyone who is looking for just a great cookie. Recipe […]