I used to think I didn’t particularly care for scones. I’d had a few that were okay, but none that were very good. I didn’t get why I’d read and heard so much raving about how awesome they were. Mostly, they were dense and heavy and tasted overwhelmingly of baking powder. Not really pleasant. And then one day I stopped at a little out of the way coffee shop in a small town, and I was craving something savoury to go with my morning coffee, so I tried one of their cheese scones. It was a revelation. Slightly crusty on the outside, unbelievably tender and flaky and buttery on the inside. So this was what a scone was supposed to be like!
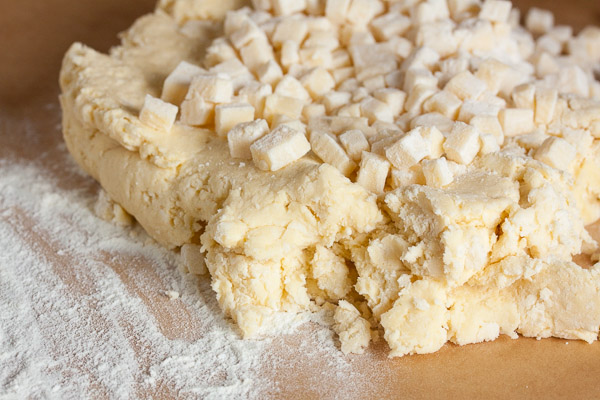
Sadly, I didn’t live anywhere near that little coffee shop, so the chance of getting scones of that quality again didn’t seem too promising. Only one thing to do – I needed to learn to make my own. I did a bit of research, and read a lot of different recipes. And I learned that the key to getting that lovely flaky texture is to use cold butter and cut it into the dry ingredients – more like a pastry. I think where most people go wrong is that they cream the butter like for a cookie dough, probably because they’re trying to cut corners while making larger quantities (just guessing here, but why else would they get it so wrong?).
This is one of the first scone recipes I tried making myself, and I was so pleased with the result I’ve made it again and again over the years. In fact, they came out really close to the ones from that little coffee shop. I’ve taken them in to work in the past and have gotten requests to bring them in again. Actually, it might be more accurate to say I’ve kinda been badgered to bring them in again (ahem). With colder weather and craving comfort foods, I decided it was finally time to revisit this recipe. Plus at this time of year, we’re all inundated with cookies and candies (and yes, I realize I’m one of the main contributors here) – it’s nice to have a savoury alternative to all those sweets.
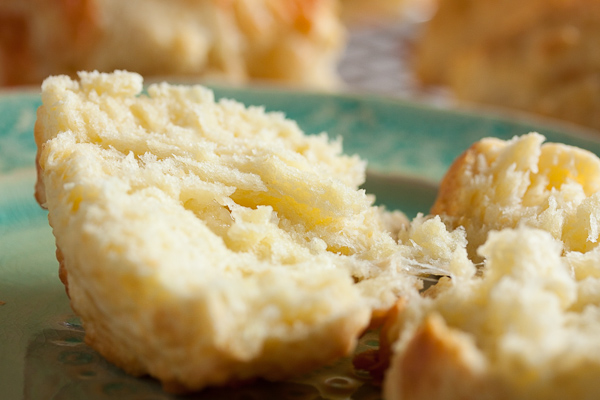
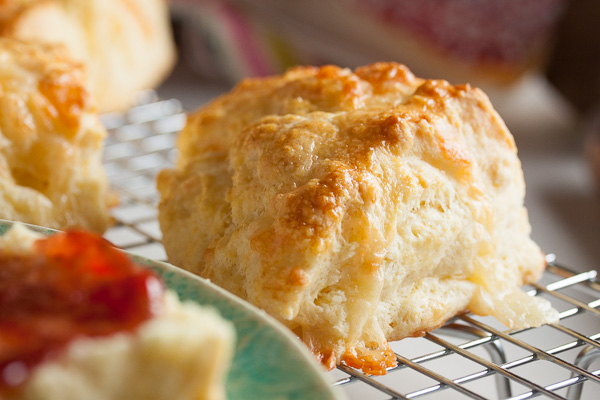
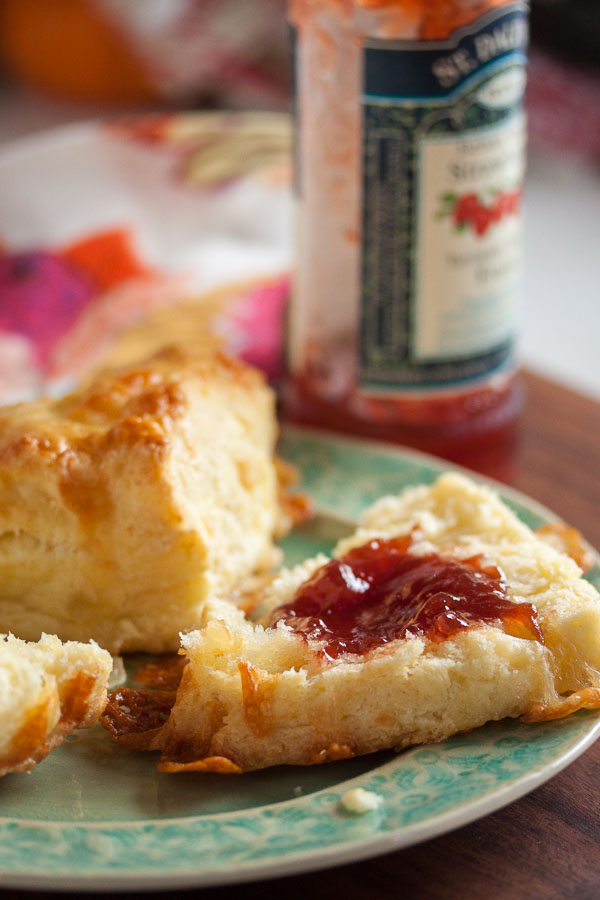
Much like the coffee shop ones, these scones are incredibly buttery and flaky and full of cheesy goodness. They’re great on their own, but my favourite way to have them is with a bit of strawberry jam. Like with the apple cheddar muffins I made this fall, the cheese here pairs really well with something slightly sweet. And of course these scones are best eaten warm. They’ll warm up okay in the microwave, but if you want that fresh-baked texture, you can re-heat them in the oven for just a few minutes.

cheese scones
Adapted from Ina Garten's Cheddar-Dill Scones. The original recipe makes 16 scones, but not knowing how they'd turn out, the first time I made these I cut the recipe in half. It was a comfortable amount of dough for kneading, and I ended up with 8 good-sized scones, so I always make this quantity now. As I was initially looking for a plain cheese scone recipe, I left out the dill from this recipe.
ingredients
2 cups all-purpose flour
1 tablespoon baking powder
1 teaspoon salt
3/4 cup cold unsalted butter, diced
2 large eggs
1/2 cup cold heavy cream
4 ounces extra-sharp cheddar cheese, small-diced
1 egg beaten with 1 tablespoon water or milk, for egg wash
Preheat oven to 400°F.
Measure and dice your butter first and then return it to the fridge to keep it cold while you prepare the rest of the ingredients.
Crack your eggs into a small bowl or measuring cup and beat lightly. Add the cream and stir together.
Combine the flour, baking powder, and salt in the bowl of a stand mixer fitted with a paddle attachment. Stir briefly on low speed to blend the ingredients. Add the butter and mix on low speed just until the butter pieces are about pea-sized. Don't overmix this – remember, these little chunks of butter are what will make your scone flaky and tender.
Add the eggs and cream and mix until just combined.
Turn the mixture out onto a lightly floured surface and add the diced cheese. Knead for about a minute, both to work the dough and to distribute the cheese.
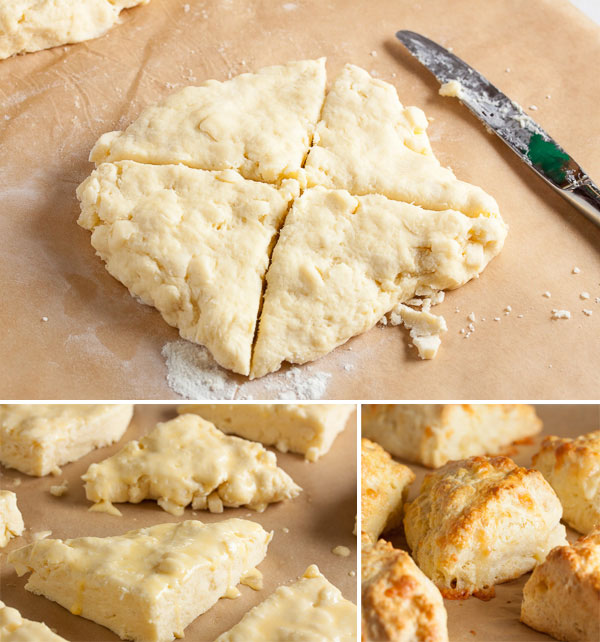
Divide the dough into two equal-ish pieces. Flatten each piece into a square-ish shape about 3/4" thick. Cut each square in half, diagonally, and then again in the other direction (see the photo above). You should end up with 8 triangles altogether. Alternately, you could flatten the pieces into circles and cut them into wedges, or even use a round biscuit cutter to cut out circle shapes. I like the triangles though.
Place the individual scones on a baking sheet, allowing some room for them to spread. Brush the tops with the egg wash.
Bake for about 20-25 minutes, rotating the baking sheet about halfway through, until the scones have risen considerably and are lightly golden brown.
Allow to cool on a wire rack for a few minutes before removing from the pan and allowing them to continue to cool.






Those look delicious! Nothing like a classic scone 🙂
Thanks Baby June! I’m kinda craving one right now…
I love scones.. but I usually make sweet ones rather than savoury. You definitely have inspired me to make something different and try these cheese scones though, they look beyond delicious.
I actually make these more often than sweet ones, but I make berry or cranberry-orange scones occasionally too. 🙂
At what temperature do you bake these?
Whoops! Thank you so much for this catch. I’ve updated the recipe – it should read 400°F.
Thanks Laurel for posting the scone recipe.
Everyone, they taste as good as they look. I have had the privilege of being on the receiving end of her baking when she shared at the office. The scones were top of the list. Or maybe it was the homemade lemon marshmallows.
Karen L
Yo Karen!! Just for that, I may need to make you some marshmallows 😉
Just made these, they turned out great! Will definitely be making again!!!
Hi Christina – I’m glad to hear you liked them too! This is one of the recipes that gets requested most often by my friends. In fact, my friend Karen just begged me to make them the other day. 🙂