

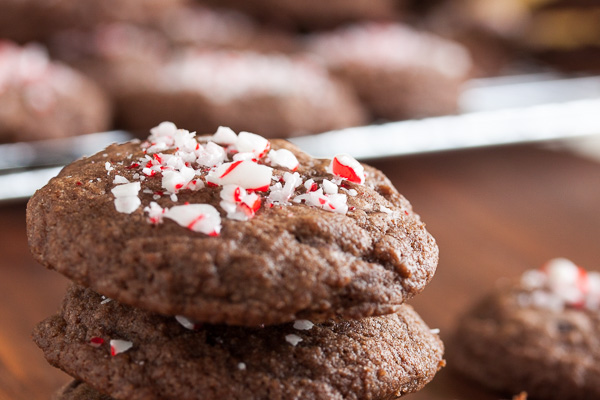
It’s become something of a tradition for me to make marshmallows at Christmas-time. When I first started making them, I just did plain vanilla, and then over the years began experimenting with different flavours and coatings. Some years I’ll go all-out and make several variations; but these days, if I’m only going to make one? It’s peppermint. It just seems so Christmas-y, right?

This is the same recipe as used for the meyer lemon marshmallows I made a few months ago, just without the lemon juice, and with peppermint flavouring added at the end.
The first time I made these, I had absolutely no clue how much peppermint flavouring to add, so I just substituted it 1:1 for the vanilla extract the recipe originally called for. Oh my. Big mistake. It was so strong they were inedible. So in an effort to save them, I decided to dip them in chocolate. That was a much better decision. With the added chocolate, they went from tasting like toothpaste to tasting like a chocolate-covered after-dinner mint. Yum.

I’ve since toned down the amount of peppermint and now use somewhere between 1 and 1-1/2 teaspoons. It’s strong enough to hold up to the dark chocolate, and yet not so strong that they can’t be eaten as-is too. And they’re fantastic added to hot cocoa.
I just dip mine halfway. Partly because I’m lazy (this is so much faster and easier than dipping them fully), but also partly because I like people to be able to see the marshmallow. Especially when I make them with swirls of colour. They’re too pretty to cover up completely.

I mentioned last time too, but if you’ve never made marshmallows before, don’t be afraid! It’s really not difficult at all. Just be very careful with the hot sugar. There’s a great discussion over at eGullet (36 pages and counting) about making homemade marshmallows. There are tons of tips and tricks and links to different recipes. I got a lot of great advice from there when I first started making them.

peppermint marshmallows

Adapted from Peter Greweling's Chocolates and Confections at Home. You'll need a heavy-duty stand mixer for this recipe – the sugar needs to whip at high speed for at least 6 minutes to turn it into marshmallow fluff. Note: when cooking sugar, subtract 2°F from the target temperature for every 1000 ft above sea level.
ingredients
3 tablespoons (about 3 envelopes) powdered gelatin (I've had success cutting this down to about 2-1/2)
1/2 cup cold water
1-1/2 cups granulated sugar
3/4 cup light corn syrup
1/4 cup honey
1/2 cup water
1 to 1-1/2 teaspoons peppermint extract
for coating
1 cup confectioner's sugar (preferably more)
1 cup potato, corn or rice starch (preferably more)
dark chocolate (for dipping – optional)
Depending on how big you want your finished marshmallows to be, you can make these with anything from an 9" x 9" pan to a 9" x 13" pan. The original recipe specified 9" x 9", but I like mine bite-sized and they ended up being about 1" thick using 9" x 13". Prepare your pan by lining it with parchment paper, then lightly oiling the parchment with a flavourless vegetable oil (not olive – it has too strong a flavour on its own). I pour a little dollop of oil right into the pan and then use a pastry brush to spread it around. You could just oil the pan directly, but I find the parchment paper makes it easier to lift the marshmallows out of the pan at the end.
Combine the gelatin and 1/2 cup cold water in a small non-reactive bowl or the top of a double-boiler. You will eventually heat this gently over simmering water, but not yet. Set aside.
Combine the sugar, corn syrup, honey and 1/2 cup water in a 2 quart saucepan and attach your candy thermometer. Cook over medium heat until the sugar has melted. Using a pastry brush dipped in cold water, brush down the sides of the pot to ensure all sugar crystals are melted. Increase to medium high and bring to a boil. Continue to cook until it reaches 252°F. This usually takes about 1/2 hour on my stove.
Carefully pour the hot sugar into the bowl of your stand mixer, pouring down the side of the bowl so it doesn't splash up. Seriously, I can't stress this enough – this sugar is extremely hot, so be careful. Insert your thermometer and let stand and cool until it reaches about 210°F, about 10 minutes.
While the sugar is cooling, melt the gelatin over a pot of simmering water on low heat. Many recipes instruct to just add the gelatin as-is to the hot sugar. I've read, however, that gelatin can lose its setting ability if it's overheated, which is why we're currently allowing the sugar to cool somewhat (I didn't make this step up – this is straight from Greweling's recipe). And melting the gelatin now will help it incorporate more smoothly.
Once the sugar has cooled, slowly pour the gelatin into the bowl, down the side the same as we did with the sugar – otherwise the sugar could splash up. Gradually turn the mixer from the lowest speed to the highest – again, we want to do this gradually so the molten sugar doesn't splash. I let it run for a few seconds at each speed before increasing. Use your best judgment here. Once you reach the highest speed, continue to whip for 6-10 minutes. The longer you whip it, the more air is incorporated and the lighter and fluffier it gets. However, the longer you whip, the stiffer it gets and the more difficult it is to pour into your pan. So there's a trade-off. I usually whip for about 8 minutes. They're plenty fluffy, and still soft enough that it's not impossible to smooth out.
Add the peppermint extract just before it finishes whipping. It will fall apart a bit when the liquid is added, but wait a few seconds and it'll come back together.
If you want to add food colouring, you can add a few drops just before it finishes whipping, or you can add it after you've turned off the mixer and just gently swirl it through with your spatula to get ribbons of colour throughout. Just a few drops will give you a nice pastel colour.
Pour the marshmallow into your prepared pan – you will need to use a spatula to scrape it out of the bowl and level it out somewhat. I like having a few whorls and ridges showing on the surface so people know these are homemade. If you want a perfectly smooth top, you can level it out with an offset spatula lightly coated with oil, or an oiled piece of parchment. You'll need to work pretty fast because the marshmallows begin to set up really quickly after removing from the mixer. Allow to sit for at least a couple hours, preferably overnight, before cutting.
trimming and finishing
Sift together the confectioner's sugar and the starch. You won't end up using all of this, but the remainder can be saved and re-used next time you want to make marshmallows. Having more than you need makes the process easier.
You can cut these using an oiled pizza cutter, knife, or pair of scissors. But I find this method messy. See my instructions here for my preferred method to cut and coat them. It's way easier!
Once they've been coated in starch, you can then dip them in melted chocolate if you like, but they're great as-is too. Try them in some hot cocoa!
These should keep for several weeks at room temperature. You'll know they're reaching the end of their life when the texture starts to get a bit grainy – this is just the sugar re-crystalizing. But honestly, you won't have any left that long! Whatever you do, do not store these in the fridge. Sugar absorbs moisture and they'll just get sticky.


I just made these, after having made the lemon ones with great success, and they were just as easy and, if possible, even more delicious. We’re having a short (and unusual) cold snap and these are going on my evening hot coca for sure!
Fantastic! I’m so glad to hear that. Did you dip them in chocolate too? I think my next experiment with marshmallows may be lime. 🙂 Maybe lime coated with coconut?
I _did_ dip them in chocolate and they were amazing!. Were. Between my family, friends and a few neighbors, we ate them all. Ah darn, I guess I’ll just have to make them again. And now I feel like I should confess that the last ones I made were actually lime, not lemon. We have a Meyer lemon tree and a Bearss lime and they both produce pretty much year round but we had more limes than lemons and I had green food coloring so I just swapped out the lemon for lime and, viola , I had lime marshmallows. They were good and if I make them again, I’m going to add more lime and dip them in chocolate too! (Dang it, I just saw that I typo’d cocoa in my previous comment. I hate it when I do that.) Thanks for posting all these yummy recipes! As you can see, I’m working my way through them. 🙂
Thank you for letting me know that! I love baking and trying new recipes and it’s so great to hear from someone like-minded ♥
And lime dipped in chocolate sounds amazing. Stealing that idea…
Next time I make the mint ones I’m going to try using Creme De Menthe for a slightly more adult version. I’ll let you know how they turn out! I’ve been toying with the idea of using Butterscotch schnapps too. I can’t stop!
ps. do you think the alcohol will mess with the recipe too much?
Hmmm, I did a quick google and found that mixing with alcohol can affect gelatin’s setting ability. I guess it will depend on the alcohol % of the liqueur. What’s the worst that can happen? You end up with marshmallow fluff that doesn’t set? You can use it as a topping for brownies or something, right? It might just take longer to set up.
I do know that adding anything with high fat content can affect how much the marshmallows fluff up when you whip them, so any type of creamy liqueurs could cause your marshmallows to be a bit flat. I have the same issue when I make chocolate marshmallows – I add cocoa powder to the mixer while they’re whipping. Not only do I get cocoa powder everywhere, but the finished marshmallows are much shorter than other varieties (but they taste great so who cares!).
PLEASE let me know how it turns out if you decide to give it a shot!
Edited to add this link if you want to give it a read… http://prezi.com/px3tr_-d1ggy/the-effects-of-vinegar-and-alcohol-on-gelatin/
[…] Peppermint Marshmallows […]